Confession time: I used to be the grim reaper of aloe plants. My first one from Home Depot? Dead within three weeks. The adorable mini aloe from Trader Joe’s? Toast by midsummer. That “foolproof” aloe my mom swore anybody could grow? Yeah, it didn’t make it past Labor Day.
But here’s the thing – after systematically murdering at least six aloe plants (I stopped counting after a while), something finally clicked. I’m now going on five years with the same massive aloe that’s survived two apartment moves, a week-long heatwave, and that time I forgot it existed for two months.
This isn’t another copy-paste guide regurgitating the same generic advice. This is what actually works when you’re caring for aloe vera indoors and don’t have a greenhouse or perfect conditions.
Finding the Right Spot: Let There Be Light (But Not Too Much)
Most care guides are frustratingly vague about light. “Bright indirect light” – what does that even mean? After plenty of crispy leaves and sad, stretched-out stems, here’s what I’ve actually learned:
Sweet spots that work:
- An east-facing windowsill = gentle morning sun = happy aloe
- A few feet back from a south-facing window = bright light without the sunburn
- West window with sheer curtains = decent backup option
- My bathroom window (east-facing) = perfect combo of light and humidity
Places that’ll kill your aloe:
- That cute spot on your coffee table = too dark, your aloe will stretch and get leggy
- Direct afternoon sun in summer = fried aloe leaves within days
- Outside on a hot patio = unless you want aloe chips
- Dark corners because “succulents are low light” = biggest lie ever
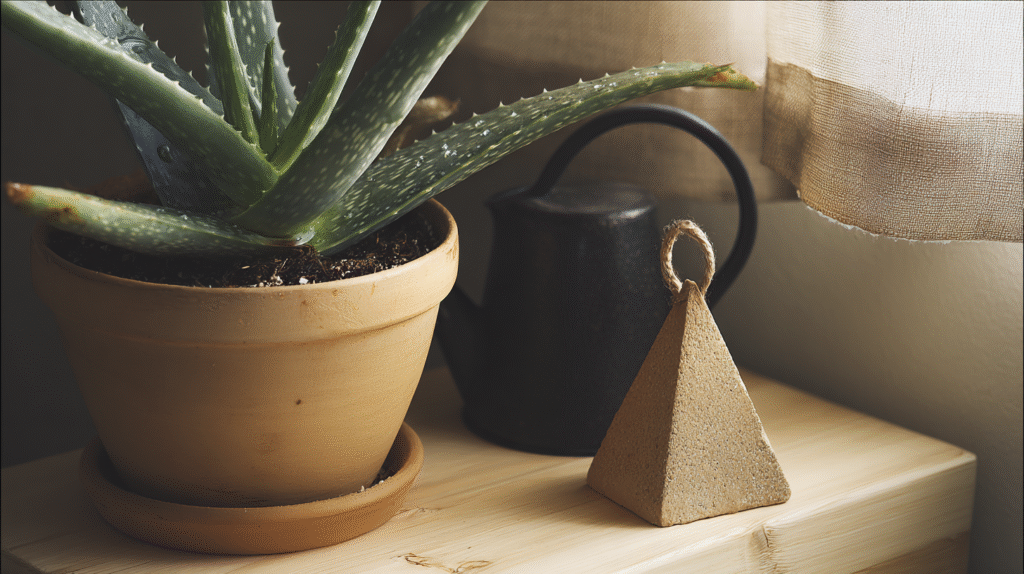
My current setup? The bathroom window facing east. Gets beautiful morning light, and the occasional shower humidity keeps it happy without any misting nonsense.
Watering: The #1 Way People Kill Their Aloe
Forget everything about watering schedules. Your aloe doesn’t own a calendar, and neither should your watering can. I killed my first three aloes by watering them like clockwork every Sunday. Turns out, that’s exactly what you shouldn’t do.
Here’s the method that changed everything:
The Squeeze Test:
Gently squeeze a thick outer leaf between your thumb and finger. Feels firm and plump? Skip watering. Feels a bit soft or thin? Time for a drink.
The Finger Test:
Stick your finger deep into the soil – like, really get in there. Any moisture at all? Walk away. Bone dry all the way down? Now we’re talking.
The Actual Watering:
When it’s time, don’t be shy. Water thoroughly until it runs out the drainage holes. Then – and this is crucial – leave it alone for 3-4 weeks. Sometimes longer in winter.
I water my big aloe maybe once a month in summer, every 6-8 weeks in winter. Your mileage may vary depending on humidity, pot size, and how much your heater runs.
Watch for these warning signs:
- Leaves turning soft and translucent = you’re drowning it
- Leaves getting thin and curling inward = it’s thirsty
- Brown mushy spots = too much water, possibly root rot
Soil That Actually Works (Skip the Bagged “Cactus Mix”)
Those pre-bagged succulent soils at big box stores? Most are garbage for aloe. They stay wet way too long and turn into concrete when dry. After losing plants to both scenarios, I started making my own mix:
My foolproof recipe:
- 1 part regular potting soil (nothing fancy)
- 1 part perlite or coarse sand
- A handful of chicken grit or small aquarium gravel
Why this works: Aloe vera is from arid regions where rain drains fast. This mix mimics that – water flows through quickly, roots get air, and your aloe doesn’t sit in moisture.
That $15 bag of “premium succulent soil”? Save your money. My DIY mix costs about $5 to make and works ten times better.
The Truth About Pots and Repotting
Terracotta pots aren’t just aesthetic – they’re functional. After losing an aloe to root rot in a cute glazed pot, I’m team terracotta all the way. They breathe, they dry out faster, and they’re cheap to replace.
Pot rules that actually matter:
- Drainage holes are non-negotiable (learned this the expensive way)
- Only go 1-2 inches wider than the current pot when upgrading
- Shallow is better than deep – aloe roots spread more than they dive
When to repot:
- Pups (baby aloes) are crowding the parent
- Water runs straight through without absorbing
- It’s been 2-3 years and growth has stalled
- The pot is literally cracking from root pressure
Common Aloe Problems I’ve Solved (The Hard Way)
Why is my aloe turning brown/red?
Usually sunburn. Move it back from the window or add a sheer curtain. Sometimes it’s a stress response – aloes can turn reddish when thirsty or cold. Not always bad, but monitor it.
Leaves are floppy and falling over:
Nine times out of ten, it’s overwatering. Unpot it, check for root rot (black, mushy roots), trim the bad stuff, and repot in dry soil. Wait a week before watering.
White fuzzy bugs?
Mealybugs. Dab with rubbing alcohol on a Q-tip. Repeat every few days until gone. If it’s bad, just toss the plant – not worth spreading to others.
Brown tips but otherwise healthy?
Could be fluoride in tap water. I switched to filtered water for a while, then realized my aloe didn’t care. Now I just trim the tips with scissors and move on.
Pro Tips That Actually Make a Difference
Rotate quarterly:
Turn your pot a quarter turn every few months. Prevents lopsided growth toward the light.
Harvest properly:
Only cut outer leaves, always from the base. Never just snip the tips – the whole leaf will die.
Winter care:
Cut watering in half and keep away from heaters. Dry air plus heat = crispy aloe.
The shower trick:
Every few months, give your aloe a lukewarm shower to wash off dust. Let it drain completely before putting it back.
Ignore the fertilizer aisle:
I’ve never fertilized my aloe. Ever. It’s thriving. Save your money.
Why Aloe Vera Is Worth the Learning Curve
Look, I get it. After killing multiple plants, you might wonder why bother. But once you crack the code, aloe vera gives back:
- Survives your vacation without a plant sitter
- Provides actual useful gel for burns and cuts
- Makes baby plants you can gift (or sell)
- Looks good even when you forget about it
- Actually gets better with benign neglect
My current aloe has been with me through thick and thin. It’s survived overwatering, underwatering, a move across town, and my learning curve. Now it’s this magnificent specimen that makes me look like I know what I’m doing with plants.
The secret? It’s not about following a strict schedule or buying expensive supplies. It’s about understanding what aloe actually needs: well-draining soil, bright light without scorching, and infrequent but thorough watering. Get these three things right, and your aloe will thrive despite your worst plant parent moments.
After five years and countless lessons learned, I can honestly say aloe vera is the perfect plant for people who want something beautiful and useful without the drama. Just remember – when in doubt, don’t water. Your aloe will thank you for it.
🌿 Got aloe questions? I’ve probably made that mistake before and lived to tell the tale!